Overview
This guide outlines the process for exporting invoices from Helix and importing them into QB using TransactionPro (RightWorks).
Prerequisites
- Ensure TransactionPro (RightWorks) is installed and configured.
- Verify both Helix and QB accounts are active and accessible.
Pre-Import Conditions
IMPORTANT: Adherence to these conditions is crucial to prevent import errors.
- Customer Name Length: The customer name should not exceed 42 characters in any documents, including invoices and payment methods.
- Customer Name Consistency: The customer name must be identical across all platforms. TransactionPro and QB do not automatically match transactions by invoice number. A discrepancy of even a single character in the name will result in an import error.
Steps for Import Preparation
Step 1: Customer Matching
- Objective: Ensure customer names in Helix match those in QB.
- Action: Import the customer list from Helix to QB with invoices. Prior to this, convert all customer names to uppercase (all capital letters) for consistency.
Step 2: Prepare RTS File for Import
- Objective: Align customer names in the RTS Payment report with those in Helix.
- Action: Match customer names from Helix with those in the RTS Payment report by invoice number. Amend names in the RTS Payment Report to match exactly, ensuring accurate values before import.
Step 3: Marking Invoices in QB
- Objective: Avoid duplicate import of the same invoice.
- Action: Mark invoices that have been prepared for import as 'Imported' in QB. This step ensures that the same invoice lines are not imported twice.
Exporting Invoices from Helix
- Follow the standard procedure in Helix to export the invoice data.
- Ensure that the exported data meets the pre-import conditions outlined above.
Importing into QB
- Use TransactionPro to import the prepared and verified data into QB.
- Follow the on-screen prompts in TransactionPro to complete the import process.
Post-Import Verification
- After import, verify the accuracy of the data in QB.
- Ensure there are no duplicate entries and that customer names and invoice details match correctly.
Process of Exporting and Importing Invoice Lines from Helix to QuickBooks (QB)
Part 1: Export Bill Lines From Helix
Step 1: Access the Accounting Module in Helix
- Navigate to the Accounting module in your Helix system.
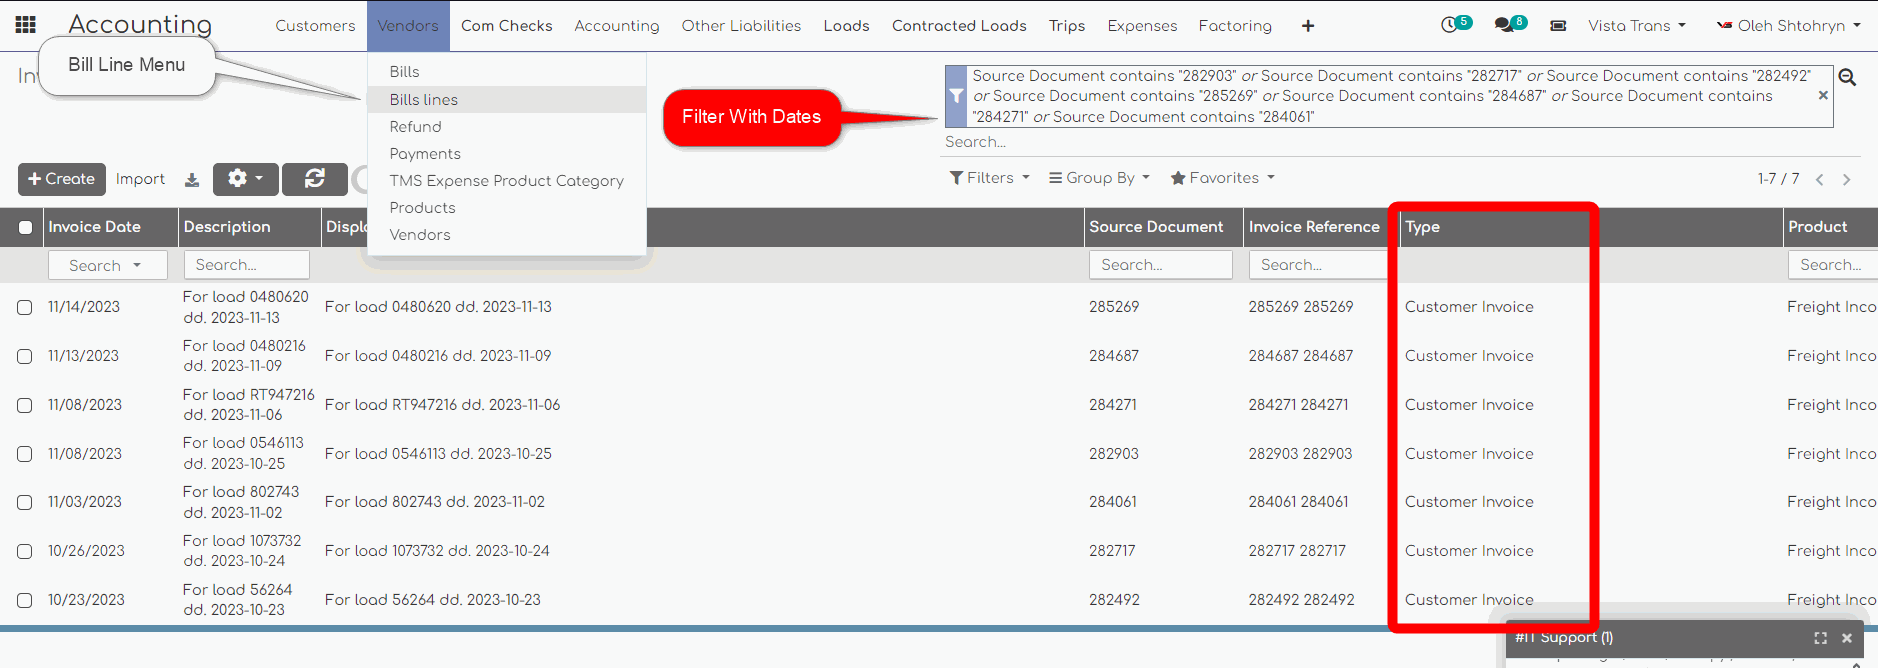
Step 2: Open Vendor Menu
- Within the Accounting module, select the 'Vendor' menu.
- From the dropdown, choose the sub-menu option for 'Bill Lines'.
Step 3: Filter Invoices
- Apply a filter for the type "Customer Invoices".
- This will display only the relevant invoices for export.
Step 4: Select Date Range
- Choose the date range for the invoices you wish to import.
- This ensures only invoices from the specified period are exported.
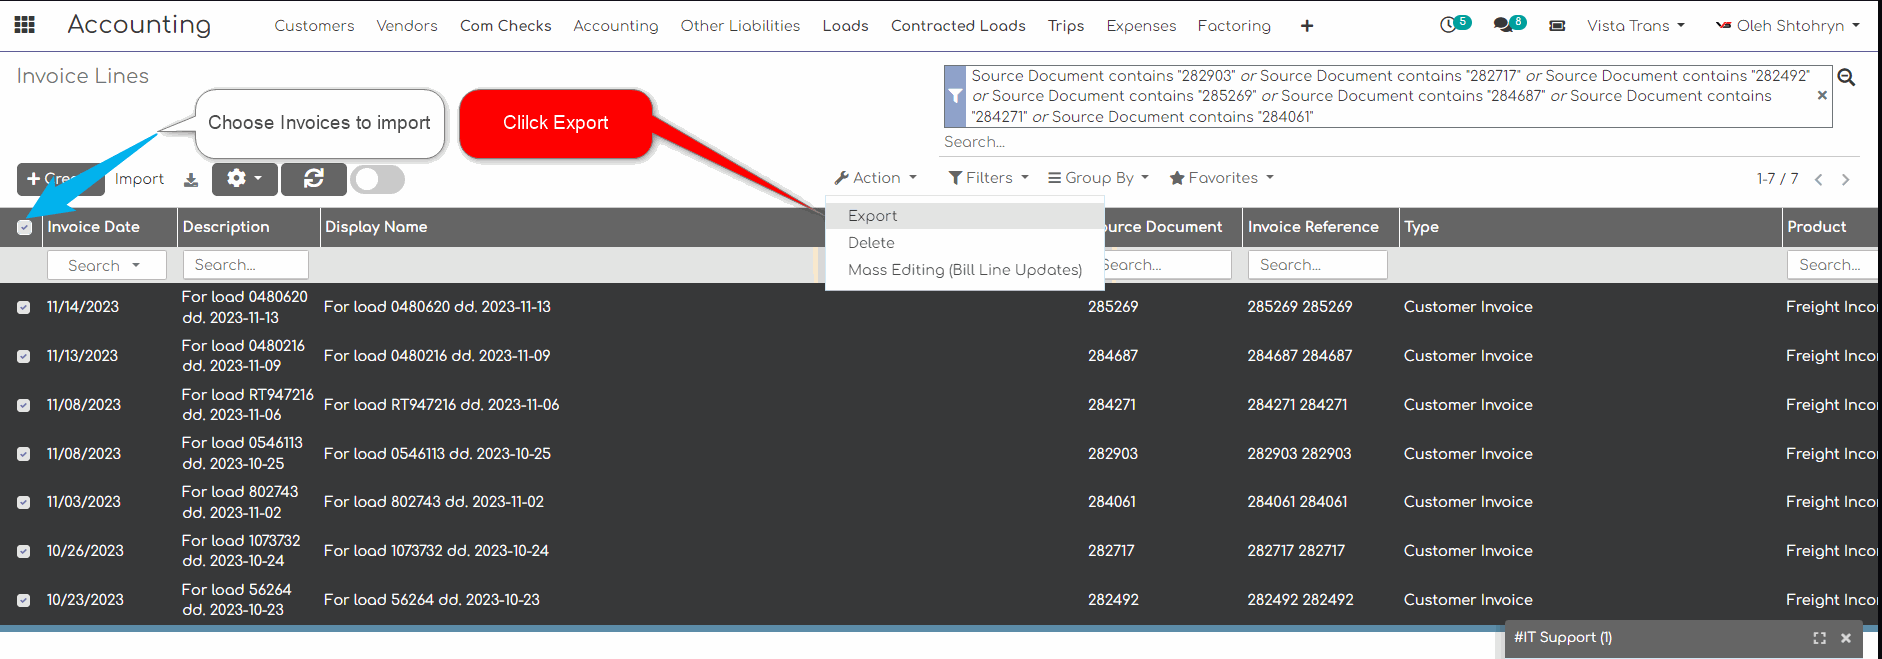
Step 5: Select Invoices for Export
- Click on the checkbox to select all invoices within the filtered list.
Step 6: Export the Data
- Click the 'Export' button.
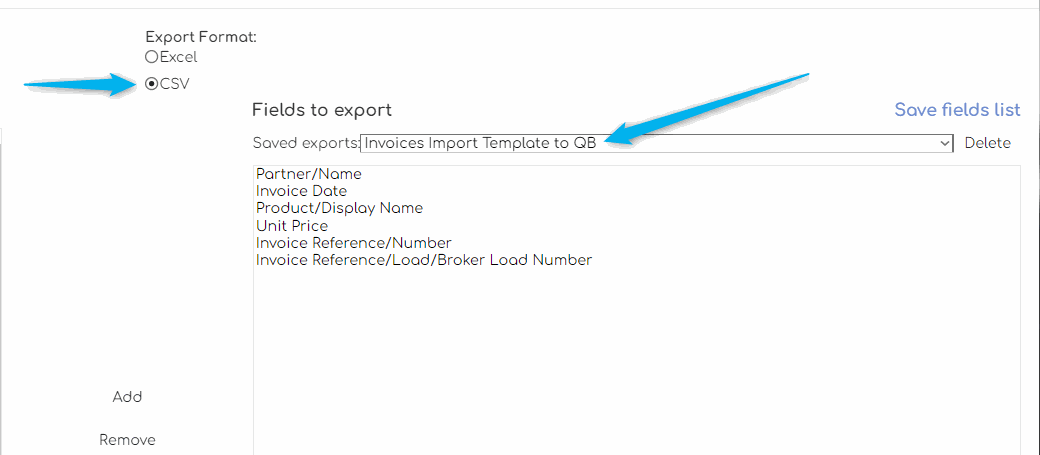
- When prompted, select the "Import Invoices to QB" template.
- Important: Ensure you choose the CSV format for the export. This is crucial for compatibility with TransactionPro.
Part 2: Import Into QuickBooks Using TransactionPro
Step 1: Launch TransactionPro
- Open TransactionPro on your computer.
- (Ensure that QuickBooks is open as well, with the Company File for the company you want to transfer to, already open.)
Step 2: Select Import Option
- In TransactionPro, navigate to the Import Menu.
- Choose 'Invoices' as the type of data to import.
Step 3: Choose the Exported File
- Browse and select the CSV file you exported from Helix.
Step 4: Begin the Import Process
- Click 'Next' and follow the on-screen instructions in TransactionPro.
- Continue clicking 'Next' until TransactionPro prompts you to finish the import.
Step 5: Reference Visual Guides
- Refer to the provided pictures below for visual guidance through each step of the TransactionPro import process.
Import Invoices To QB
Choose a vibrant image and write an inspiring paragraph about it.
It does not have to be long, but it should reinforce your image.


Import Payments From RTS
Import of Invoices and Payments from Helix to QB